Valentine Butter Cookies with Icing
Highlighted under: Cozy Collection
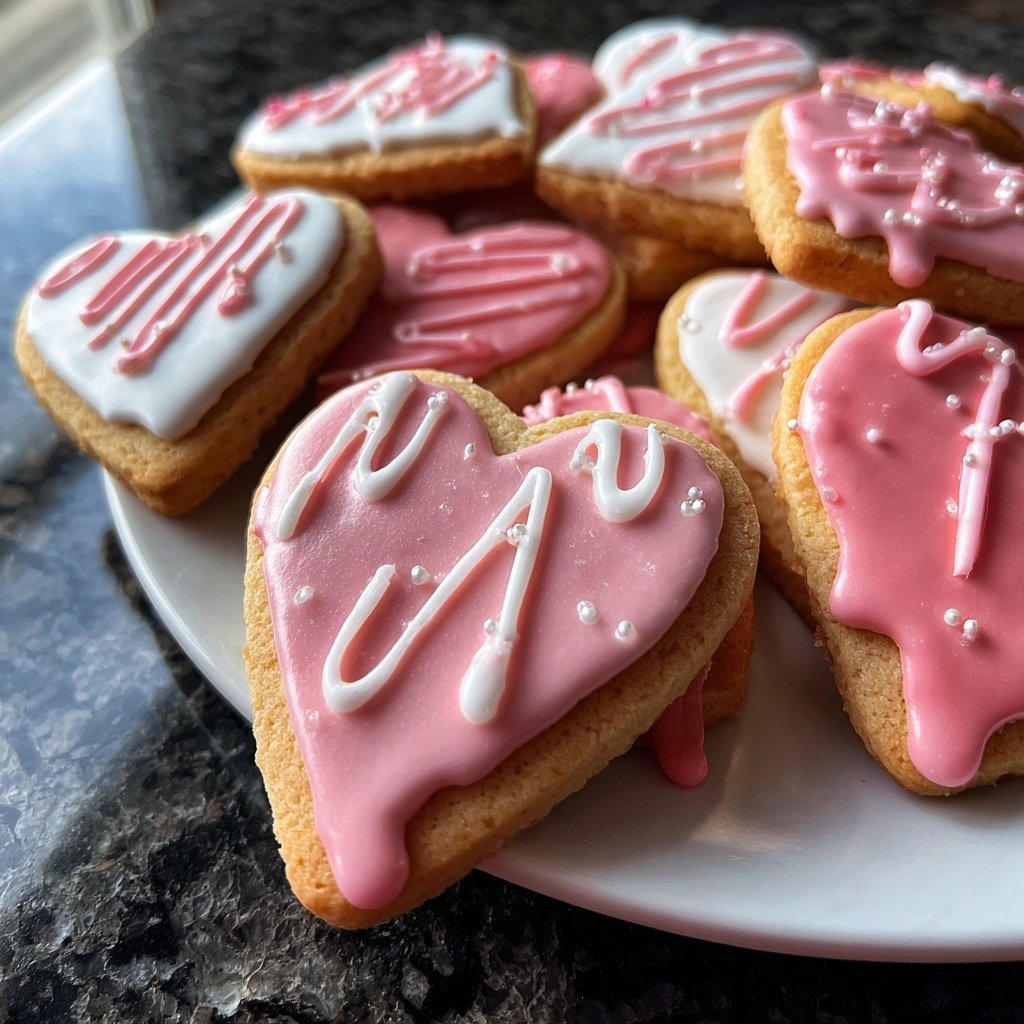
I absolutely love baking for special occasions, and these Valentine Butter Cookies with Icing hold a special place in my heart. The buttery flavor combined with a sweet, soft texture makes them irresistible. I enjoy decorating each cookie with colorful icing, which adds a personal touch to my treats. When I’m in the kitchen making these cookies, it becomes a joyful experience that brings back fond memories of baking with loved ones. They are perfect for sharing with friends or surprising someone special on Valentine's Day.
When I first attempted to make these Valentine Butter Cookies, I was surprised at how quickly they came together. The key is to ensure your butter is at room temperature; this allows for the creamiest texture. I also found that chilling the dough for just a bit before baking results in a perfect shape when they come out of the oven.
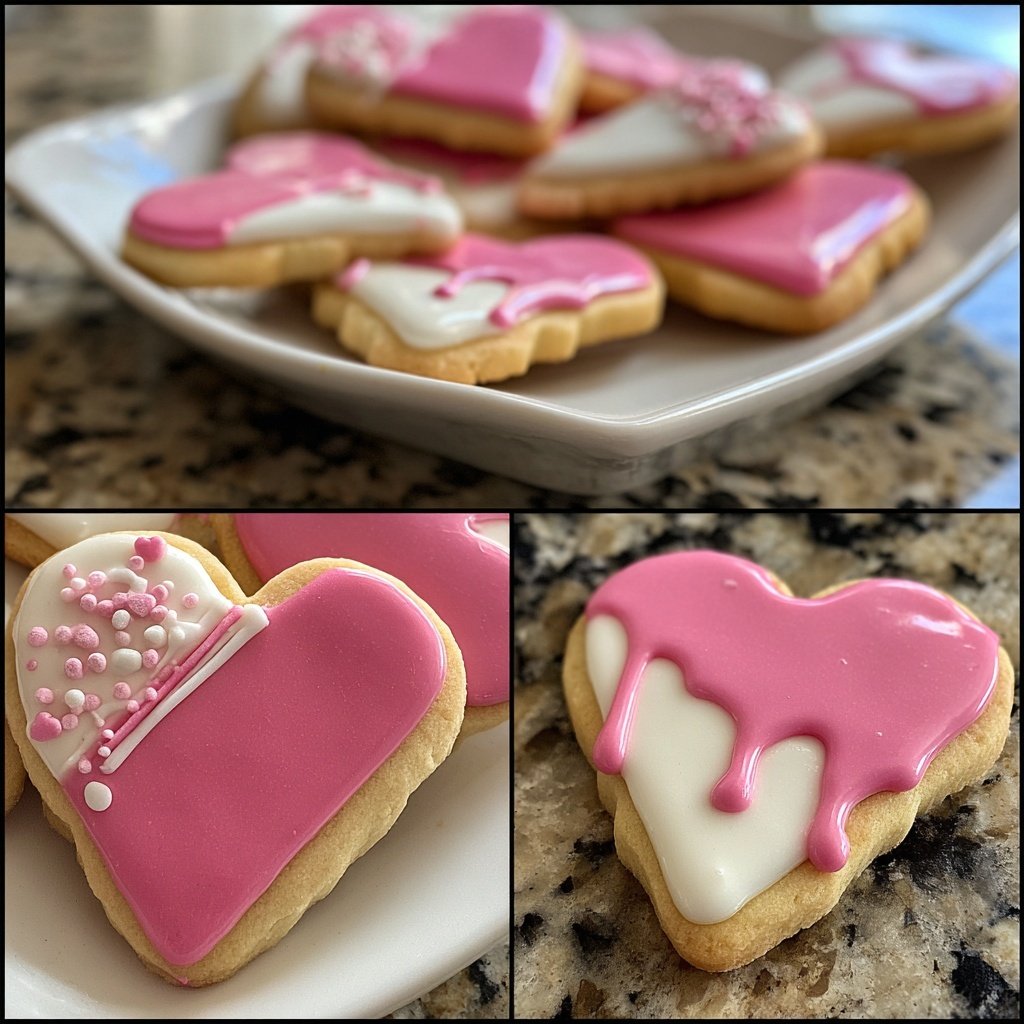
As I decorated these cookies with icing, I realized how much creativity this process allows. Using various colors of icing and sprinkles transforms each cookie into a little masterpiece. I always recommend letting your icing dry completely before stacking them to maintain their charming designs.
Why You Will Love This Recipe
- Buttery texture that melts in your mouth
- Fun and creative decorating process
- Perfect for sharing on Valentine's Day
Understanding the Ingredients
The primary ingredient for these Valentine Butter Cookies is high-quality unsalted butter. Since butter is responsible for the cookies' delightful texture and rich flavor, using fresh butter is crucial. Softer butter also helps incorporate air when creaming, yielding a light and fluffy dough. Don't forget to bring the butter to room temperature for the best mixing results; this typically takes about 30-60 minutes after removing it from the fridge.
Granulated sugar not only sweetens the cookies but also contributes to their delicate texture. The creaming process with the butter is essential as it introduces air, creating a soft and tender crumb. Additionally, the baking powder acts as a leavening agent, which gives the cookies their shape and prevents them from becoming too dense. Ensure you measure your flour accurately, as too much can lead to dry cookies.
Baking Techniques to Perfect Your Cookies
When shaping your cookies, uniformity is key to even baking. I recommend using a cookie scoop or a tablespoon to ensure each ball of dough is the same size. This will help them bake at the same rate, preventing some from being overdone while others remain underbaked. Keep in mind that the cookies will spread slightly in the oven, so leave adequate space on the baking sheet—about 2 inches apart is ideal.
Baking times can vary based on your oven, so keep an eye on the cookies. They should be placed in the center of the oven and should come out when the edges are lightly golden, while the centers might look slightly soft. If you prefer a crispy texture, you can leave them in the oven for an additional minute or so, but check frequently to avoid overbaking, which can lead to dry cookies.
Decorating Your Cookies
Once the cookies have cooled completely, the fun part begins—decorating with icing! To achieve a glossy finish, ensure that your icing has a good consistency; it should be thick enough to hold its shape but fluid enough to spread easily. If the icing is too thick, add a little more milk; if it's too runny, you can incorporate more powdered sugar. A piping bag or zip-top bag with a corner snipped off can help you achieve clean lines and designs.
For a personal touch, try using various colors of icing and different sprinkle types to make your cookies visually appealing. You can even use edible glitter for an extra sparkle! Consider cutting the cookies into heart shapes or other fun designs using cookie cutters to enhance their festive appeal. Don’t forget, these cookies not only taste great but can also serve as lovely decorative pieces for your Valentine's Day celebrations.
Ingredients
Gather all the ingredients needed for your cookies before starting to bake.
Cookies
- 2 cups all-purpose flour
- 1/2 teaspoon baking powder
- 1 cup unsalted butter, softened
- 3/4 cup granulated sugar
- 1 large egg
- 1 teaspoon vanilla extract
- 1/2 teaspoon salt
Icing
- 2 cups powdered sugar
- 2 tablespoons milk
- 1 teaspoon vanilla extract
- Food coloring (optional)
- Sprinkles (optional)
Once you have all your ingredients ready, you’re set to start baking!
Instructions
Follow these steps carefully to create delicious Valentine Butter Cookies.
Preheat the oven
Preheat your oven to 350°F (175°C). Line a baking sheet with parchment paper.
Mix dry ingredients
In a bowl, whisk together the flour, baking powder, and salt. Set aside.
Cream butter and sugar
In a large bowl, cream the softened butter and granulated sugar until light and fluffy.
Add egg and vanilla
Beat in the egg and vanilla extract until well combined.
Combine mixtures
Gradually add the dry ingredients to the butter mixture, mixing until just combined.
Shape the cookies
Scoop tablespoons of dough and roll into balls. Place them on the prepared baking sheet, spacing them apart.
Bake
Bake for 10-12 minutes or until the edges are lightly golden. Let them cool on the baking sheet for a few minutes before transferring to a wire rack.
Prepare icing
In a bowl, mix powdered sugar, milk, and vanilla extract until smooth. Add food coloring if desired.
Decorate cookies
Once the cookies are completely cool, decorate them with icing and sprinkles as desired.
Enjoy your delicious Valentine Butter Cookies with your loved ones!
Pro Tips
- For an added twist, try flavoring the icing with different extracts like almond or lemon. Experiment with different colors to match your Valentine’s theme!
Storage Tips
To ensure your Valentine Butter Cookies stay fresh, I recommend storing them in an airtight container at room temperature. They will maintain their best quality for up to a week. If you want to keep them for a longer period, you can freeze the baked cookies without icing for up to three months. Just make sure they are completely cooled before freezing, and separate layers with parchment paper to prevent sticking.
If you decide to freeze the cookies, allow them to thaw at room temperature before decorating. This step is crucial as icing can become runny on a warm cookie. You can also freeze the dough itself. Shape the cookie balls and place them on a baking sheet, freeze until solid, then transfer them to a zip-top freezer bag. When you're ready to bake, no need to thaw—just add an extra minute or two to the baking time.
Substitutions and Variations
If you're looking for a dairy-free option, you can substitute the unsalted butter with plant-based butter easily available in stores. Additionally, for a gluten-free version, try using a 1:1 gluten-free flour blend that is suitable for baking; just keep an eye on the texture as these can behave differently than traditional flour.
For a flavor twist, consider integrating citrus zest like orange or lemon into your dough. This will not only add a delightful aromatic touch but also balance the sweetness of the icing. You can also experiment with different extracts; almond extract could replace vanilla for a unique flavor profile that enhances the cookies.
Serving Suggestions
These Valentine Butter Cookies aren't just a sweet treat; they can also be served as part of a larger cookie platter, paired with coffee or milk for a delightful snack. To make them a romantic gift, consider stacking them in a decorative box or wrapping them in cellophane tied with a pretty ribbon. It's an excellent way to show someone you care.
For a more interactive experience, you might host a cookie decorating party where friends can come together to decorate their cookies. Set out various icing colors and toppings, allowing each person to personalize their own cookies. This would be a fun way to bond and create lasting memories on Valentine's Day while enjoying delicious cookies together.
Questions About Recipes
→ Can I use margarine instead of butter?
While you can use margarine, the flavor and texture may differ. Unsalted butter is recommended for the best results.
→ How can I store the cookies?
Store the cookies in an airtight container at room temperature for up to one week.
→ Can I freeze the cookie dough?
Yes, you can freeze the cookie dough for up to three months. Just thaw it in the refrigerator before baking.
→ What can I use instead of powdered sugar for icing?
Powdered sugar is best for icing, but you can use a sifted alternative like coconut sugar, though it might affect the color and texture.
Valentine Butter Cookies with Icing
Created by: Tilda Greenwood
Recipe Type: Cozy Collection
Skill Level: Easy
Final Quantity: 24 cookies
What You'll Need
Cookies
- 2 cups all-purpose flour
- 1/2 teaspoon baking powder
- 1 cup unsalted butter, softened
- 3/4 cup granulated sugar
- 1 large egg
- 1 teaspoon vanilla extract
- 1/2 teaspoon salt
Icing
- 2 cups powdered sugar
- 2 tablespoons milk
- 1 teaspoon vanilla extract
- Food coloring (optional)
- Sprinkles (optional)
How-To Steps
Preheat your oven to 350°F (175°C). Line a baking sheet with parchment paper.
In a bowl, whisk together the flour, baking powder, and salt. Set aside.
In a large bowl, cream the softened butter and granulated sugar until light and fluffy.
Beat in the egg and vanilla extract until well combined.
Gradually add the dry ingredients to the butter mixture, mixing until just combined.
Scoop tablespoons of dough and roll into balls. Place them on the prepared baking sheet, spacing them apart.
Bake for 10-12 minutes or until the edges are lightly golden. Let them cool on the baking sheet for a few minutes before transferring to a wire rack.
In a bowl, mix powdered sugar, milk, and vanilla extract until smooth. Add food coloring if desired.
Once the cookies are completely cool, decorate them with icing and sprinkles as desired.
Extra Tips
- For an added twist, try flavoring the icing with different extracts like almond or lemon. Experiment with different colors to match your Valentine’s theme!
Nutritional Breakdown (Per Serving)
- Calories: 200 kcal
- Total Fat: 10g
- Saturated Fat: 6g
- Cholesterol: 30mg
- Sodium: 45mg
- Total Carbohydrates: 28g
- Dietary Fiber: 0g
- Sugars: 12g
- Protein: 2g